Exchange 2010 to Exchange 2016 Migration-Part 2: Exchange 2010 Installation and configuration
- Radhakrishnan Govindan
- Mar 27, 2016
- 1 min read
In this Part 2 article, We will see how to install Exchange 2010 and configure the services.
If you would like to read the part 1 in this article series please go to Exchange 2010 to Exchange 2016 Migration -Part 1: AD Installation
Install Windows features by running the below command,
Install-WindowsFeature Telnet-Client,RSAT-ADDS, RSAT-Clustering,Web-Server,Web-Basic-Auth,Web-Windows-Auth,Web-Metabase,Web-Net-Ext,Web-Request-Monitor,Web-Static-Content,Web-Mgmt-Console,Web-Lgcy-Mgmt-Console,Web-WMI,WAS-Process-Model,Web-Asp-Net,Web-Client-Auth,Web-ISAPI-Ext,Web-ISAPI-Filter,Web-Http-Errors,Web-Http-Logging,Web-Http-Redirect,Web-Http-Tracing,Web-Digest-Auth,Web-Dir-Browsing,Web-Dyn-Compression,NET-HTTP-Activation,RPC-Over-HTTP-Proxy –Restart -source d:\sources\sxs
.\Setup /preparead /OrganizationName: Windowstechpro
We are setting up the Exchange 2010 Infra as per the below Diagram.
One Client Access Server for both Internal and External Namespaces
2 Mailbox Servers- DAG configured with 2 Nodes with Witness
Installing Client Access server role On the Server, Click on Exchange 2010 setup file
Click on Next
Click on Next
Click on Next
Select Customer Exchange Server Installation and click on Next
Select Client Access Role and Click on Next
Select The Client Access server role will be Internet-facing and enter webmail.windowstechpro.com and Click on Next
Click on Next
Click on Install
Click on Finish Post completion of the installation
Installing Mailbox and Hub Transport Server roles in the two Servers Click on Install Microsoft Exchange
Click on Next


Select Custom Exchange Server Installation and Select Automatically install Windows server roles and features required for Exchange and Click on Next
Select Mailbox Role and Hub Transport Role and Click on Next
Click on Next
Click on Next
Click on Finish post successful installation of the server roles
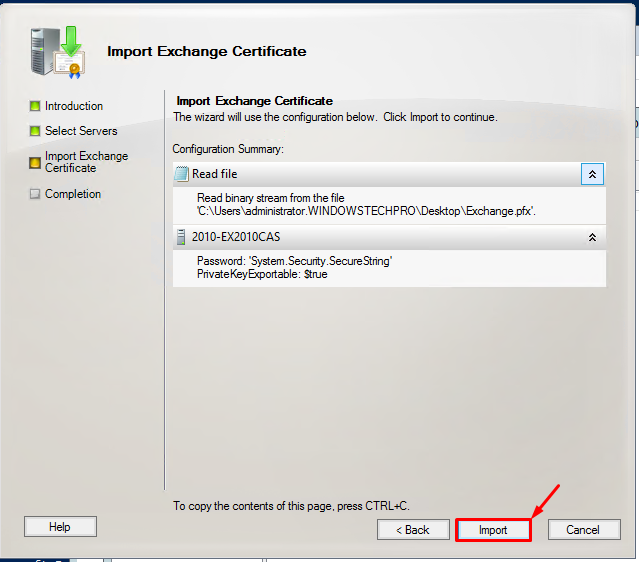
follow the above steps and get installed Mailbox and Hub Transport roles in the other Server as well. Certificates Binding for the Services Request the Certificates from Certificate Services and keep the certificates it ready in PFX format stored in the Client Access Server Open Exchange management Console and Click on Import Exchange Certificates
Select Certificate and Enter the Password
Select Exchange Client Access server for which you wanted to bind the Certificates


You can see the certificates Assigned to the services properly. You can the delete other certificates if you don’t want to keep them in the Exchange server.


If you would like to read the part 1 in this article series please go to Exchange 2010 to Exchange 2016 Migration -Part 1: AD Installation

Comments